4-Ingredient Rolled (Citrus!) Sugar Cookies
Prep time
Cook time
Total time
By: Emily Stoffel (adapted slightly from this recipe)
Makes: 24-48 cookies, depending on size
Ingredients
- For the Cookies
- 1 cup salted butter, softened at room temperature
- 1 cup powdered sugar
- 3 tsp vanilla extract (or 1½ tsp Mexican vanilla extract + 1½ tsp pure lemon extract, see Note)
- 2 cups all-purpose flour
- For the *Optional* Icing (Note: icing is not egg-free as written)
- 3 T meringue powder (contains eggs)
- 4 cups sifted powdered sugar
- 5 T water
- 1½ tsp almond extract (or extract of your choice, see Note)
Instructions
- To Make the Cookies: In the bowl of a stand mixer (or using a hand mixer), cream butter on medium speed until light and smooth. Add sugar, scraping down sides of bowl as necessary, until smooth. Add vanilla (or vanilla + lemon extracts) and mix until incorporated. Add flour and mix until combined, again scraping down sides of bowl as needed. Gather dough into two balls, using a little flour to prevent sticking if necessary; flatten dough into discs, wrap tightly with plastic wrap and let rest in the refrigerator for 1 hour or until firm. (At this point you can also freeze the dough -- just thaw in fridge for one day before you intend to roll/bake.)
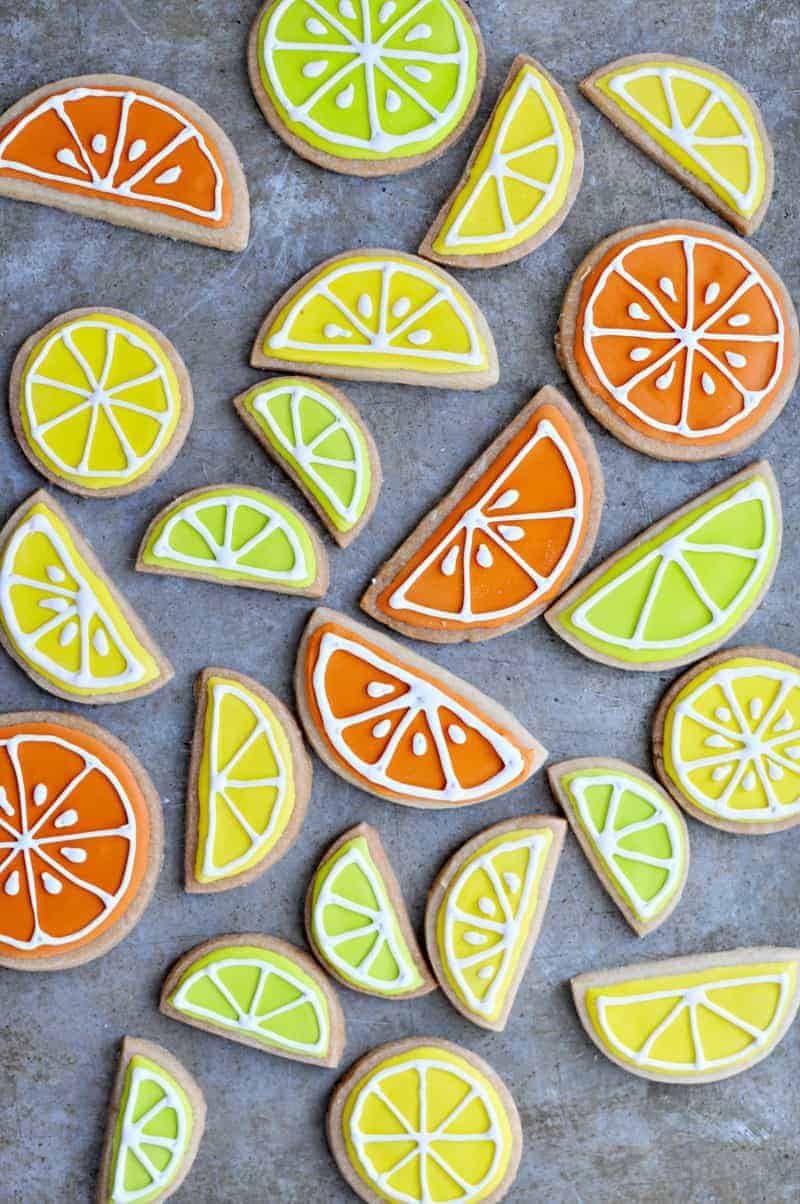
- Preheat oven to 325F. Using a well floured pin and cutting board, roll dough to about ¼" thickness and cut into desired shapes. For the citrus shapes you see here, I used round biscuit cutters of several sizes and just halved them.
- Gently transfer cookies to a Silpat- or parchment-lined baking sheet, arranged ½" apart, and bake for approx. 16-20 mins, or until edges are just starting to turn brown.
- Transfer cookies to cooling racks and let cool completely.
- To Decorate the Cookies: While cookies are cooling, combine all icing ingredients except almond extract in a large bowl and beat at medium speed until icing forms peaks, whitens in color and loses its sheen, about 5-7 mins. Add extract and mix briefly until combined.
- To make the colors shown here, reserve ¼ of the white icing paste in a small bowl. Cover with a damp towel weighted with a small plate and refrigerate until needed.
- Tint remaining ¾ of the icing bright yellow (I used a gel color); then, divide yellow icing among three bowls, adding a smidge of red to one and a tiny smidge of green (or an even tinier smidge of blue) to the other until you reach your desired orange and lime-green hues.
- Thin colored icings to a "topcoat" consistency (I won't pretend to be an expert on this by any means, but this video superbly demonstrates the basics of royal icing + approximate amounts of water needed to reach each consistency) and create the base color for each cookie. My favorite topcoating method is to use a tiny spoon to dollop a small amount of icing in the center of the cookie (less is more, you can always add) and then drag the icing just shy of the cookie's edge with a toothpick or trussing needle, dabbing on a little more icing at a time, if needed. (Keep any icing that you're not currently using fresh by covering it with a damp towel while you work.) Allow base color to dry completely before adding details -- anywhere from 30 mins to several hours depending on the exact consistency and thickness of your icing.
- To create segment details, bring reserved white icing paste to "outlining" consistency (again, see video link above -- told you it's a gem!) and pipe details onto each cookie using a parchment cone or piping bag fitted with a fine tip.
- Allow icing details to dry completely before stacking or storing. Cookies are best enjoyed fresh but will last up to 1 week when stored on the counter in an airtight container, softening ever so slightly. Enjoy!
Notes
Regarding the flavoring of these cookies, I love the flavor of equal parts vanilla and lemon extract, which yields a cookie with more depth than just "sugar" while not tasting discernibly like vanilla or lemon. Feel free to use all vanilla, if it's what you've got.
As for the icing, I find that just a small amount of almond extract transforms Royal Icing into more of a true confection and less of a cloyingly sweet, one-dimensional glue. Again, the almond flavor isn't distinct at all.
Finally, the time noted in this recipe doesn't account for chilling the dough OR icing the cookies, which can vary greatly. If you're short on time or patience, the rolled sugar cookies, sans icing, are almost as tasty as their gussied up counterparts. :)
Recipe by the pig & quill at https://thepigandquill.com/4-ingredient-rolled-sugar-cookies-egg-free/